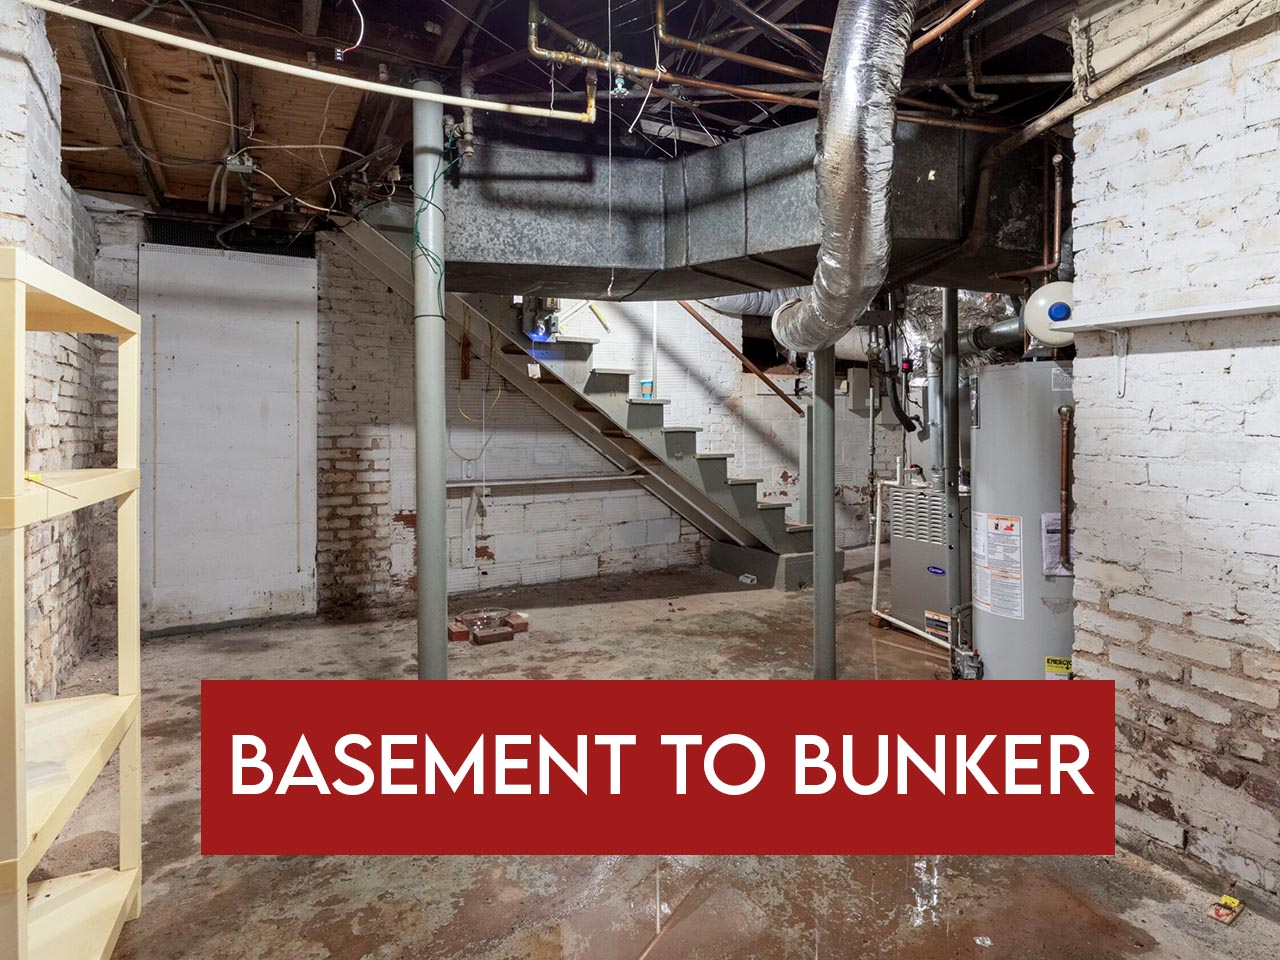
When the SHTF nuke fallout, societal collapse, or a mob at your door you need a fortress, not a storage room. Turning your basement into a survival vault takes grit, cash, and elbow grease. If it’s too small or weak, you might need to dig deeper. Here’s how to lock it down, step by step, prepper style.
Step 1: Assess Your Basement—Know Your Bones
Check what you’re working with. Most basements are concrete, but age and build matter. Cracks, leaks, or thin walls? You’ve got work. Measure space 10×10 ft per person minimum for a month’s stay. Low ceiling? Bad air flow? Digging down might be your play. Grab a flashlight, crawl every inch know your weak spots before you swing a hammer.
Step 2: Reinforce the Walls—Make It a Tank
Basement walls take a beating earth pressure, quakes, blasts. If they’re cinderblock or old concrete, beef ‘em up. Pour 6-inch reinforced concrete over existing walls rebar every 16 inches, vertical and horizontal. Tie it to the floor and ceiling with steel anchors. Cracks? Inject epoxy seals ‘em tight. Nuke threat? Add a 12-inch layer radiation don’t play. This ain’t cheap $5,000-$10,000 but collapse ain’t either.
Step 3: Waterproof It—Keep the Wet Out
Water’s a bunker killer floods, leaks, mold. Start with the outside: dig around the foundation, slap on a waterproof membrane (bitumen or rubberized asphalt), and add a French drain gravel and pipe to shunt water away. Inside, seal walls with hydraulic cement, then coat with Drylok or Xypex blocks moisture like a champ. Floor seeping? Lay a vapor barrier (6-mil poly), then pour a 2-inch concrete slab with a slight slope to a sump pump. No power in SHTF? Hand-pump backup don’t drown in your own safehouse.
Step 4: Soundproof It—Ghost the Noise
Mobs, looters, or screams soundproofing keeps you off the radar. Line walls with mass-loaded vinyl (MLV) 1 lb per sq ft, heavy as hell, kills noise. Double up with 5/8-inch drywall, Green Glue between layers vibrations die fast. Ceiling? Same deal—MLV, then rockwool batts for extra deadening. Door’s the weak link—swap for a steel blast door, seal with acoustic caulk. Quiet means invisible don’t let ‘em hear you breathe.
Step 5: Air & Power—Breathe and See
Bunker’s a tomb without air nuke dust, smoke, or gas don’t care. Install an NBC air filtration system Safe Cell or Titan pulls 40 CFM, filters fallout, bio crap, everything. Vent pipes out camouflage ‘em in bushes. Power? Solar gen with battery bank 200W panel, 100Ah battery runs lights, pump, filter for a week. Grid’s toast in SHTF don’t bet on it. Hand-crank backup for air if you’re desperate spin to live.
Step 6: Stock & Secure—Lock It Down
Water, food, meds 1 gallon, 2,000 calories per person per day, 90-day minimum. Shelves on walls don’t crowd the floor. Weapons stash AR-15, 9mm, 1,000 rounds each, hidden panel. Blast door’s non-negotiable 2-inch steel, triple locks, $2,000 well spent. Escape hatch? Dig a 3-ft tunnel to a hidden exit cover with a fake rock. Looters come, you’re gone.
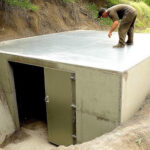
Step 7: If Basement Ain’t Enough—Dig Deeper
Basement too small, too shallow, or too exposed? Dig down. Below your basement, excavate 10-15 ft nuke shielding needs 3 ft of earth minimum. Rent a mini-excavator $300/day or shovel if you’re a beast. Pour a 12-inch concrete floor, walls, ceiling rebar grid, same as above. Tie it to the house foundation with steel beams don’t let it shift. Waterproof double groundwater’s deeper down. Air pipes longer, filtration stronger same NBC system, but add a CO2 scrubber. Cost? $20,000-$50,000 your life’s worth more. Check local codes don’t get shut down mid-dig.
Prepper Truth
My Virginia bunker started as a basement now it’s a vault. Walls like a tank, dry as bone, quiet as a grave digging deeper cost me a fortune, but I sleep like a king when the world burns. SHTF don’t care about your budget waterproof, soundproof, reinforce, or regret. Build it right, or don’t bother half-assed bunkers are just fancy tombs.
Power Up: Keep the Lights On in Your Basement Bunker
No juice, no chance SHTF means the grid’s ash, so your basement bunker needs its own power. Solar’s your best bet: a 200W panel with a 100Ah battery bank $500-$1,000 runs lights, a fan, and your air filter for a week. Mount the panel on the roof, angle it south, wire it through a charge controller to a deep-cycle battery stashed inside. No sun? Hand-crank generator $50, 30 minutes of sweat for an hour of light. Stock LED headlamps Fenix HM50R, 500 lumens, rechargeable, $60 and AA-powered lanterns like the Energizer Vision HD, $15, 1,000 hours on a set. Batteries? AA and AAA, 100-pack, 10-year shelf life rotate ‘em. Run wires in conduit along walls keep ‘em off the floor, flood-proof. Gas gen? Risky CO kills in tight spaces, but a small inverter gen like the Honda EU2200i, $1,200, works if you vent it right. Power’s life don’t go dark when the world does.
Gear to Grab: Power Up Essentials
Lock in your power with the Renogy 200W Solar Panel Kit rugged, efficient, SHTF-ready Renogy Link: https://amzn.to/3DOVC42
Pair it with the Renogy 100Ah Deep Cycle Battery reliable juice for the long haul Renogy Battery Link: https://amzn.to/4cbtSD6
For hands-free light, the Fenix HM50R Headlamp’s a beast 500 lumens, built to last Fenix Link: https://amzn.to/43x12uU
Need a backup? Hand Crank Charger keeps you powered with muscle or sun radio, light, and phone charging in one Hand Crank Link: https://amzn.to/3QYogm9
Grab ‘em now darkness waits for no one.
Notice: Amazon affiliate links earn us a small commission if you buy something no extra cost to you. That’s how we fund our prepper guides. If you find my survival tips helpful, you can support me by usin’ these links to gear up for SHTF.


